Are you the proud owner of a vintage vanity table that has seen better days? Are you looking to breathe new life into this timeless piece of furniture? Whether you inherited it from your grandmother or stumbled upon it at an antique store, transforming a 1942 vanity table can be a rewarding and creative project. In this article, we will guide you through the process of rejuvenating your cherished vanity table and turning it into a stunning focal point for your space.
Vintage furniture holds a special charm and history, and a 1942 vanity table is no exception. This article will provide you with step-by-step guidance on how to revive and revitalize your vanity table, allowing you to enjoy its beauty and functionality for years to come.
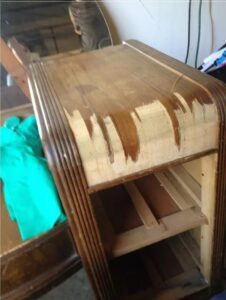
Assessing the Condition of Your Vanity TableBefore you embark on the restoration journey, carefully examine your vanity table’s condition. Take note of any scratches, dents, or missing components that require attention. This assessment will help you determine the extent of the restoration needed.
Choosing the Right Restoration ApproachDepending on your vanity table’s condition, you can opt for a full restoration or a more minimalist approach that preserves its vintage charm. Your choice will influence the techniques and materials you use throughout the process.
Preparing the Work AreaCreating a suitable workspace is essential for a successful restoration project. Clear a well-ventilated area and gather the necessary tools, including safety equipment, sandpaper, paintbrushes, and cleaning supplies.
Stripping and Sanding the Vanity Table
To reveal the beauty hidden beneath layers of paint and varnish, start by carefully stripping the old finish. Sand the surfaces to achieve a smooth and even texture, preparing the vanity table for the upcoming restoration steps.

Repairing and Replacing Hardware
Inspect and repair or replace any damaged or missing hardware, such as drawer pulls, knobs, and hinges. Choosing hardware that complements the table’s era can enhance its authentic appearance.

Selecting the Perfect Finish
Choosing the right finish is crucial for achieving the desired aesthetic. Whether you prefer a natural wood look, a distressed finish, or a vibrant color, selecting the appropriate paint or stain will play a significant role in the final outcome.
Hollywood’s Golden Boy Vanishes – Finds a Surprising New Calling
He was a teen star with everything—fame, fortune, and a hit TV show. But just as his career reached new heights, he made a surprising decision. He stepped away from Hollywood, choosing a life path few had expected.
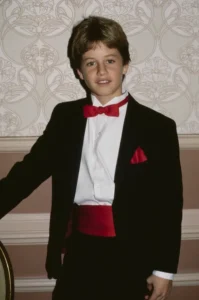
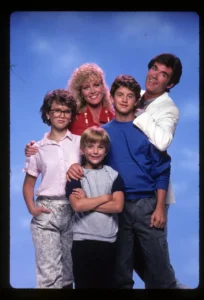
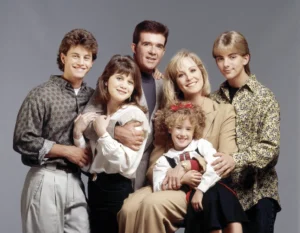
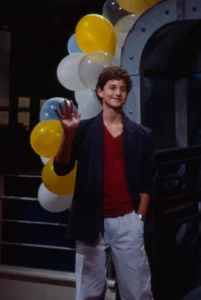
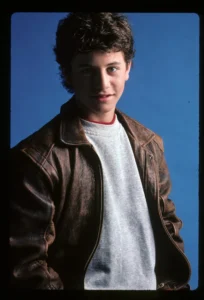
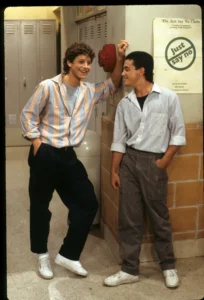
As a beloved child actor on “Growing Pains,” he became one of the most popular young stars of the 1980s. Teen magazines put him on their covers, and fans adored him. However, behind the fame, he struggled with the feeling that Hollywood wasn’t where he was meant to be.
At the height of his fame in the early 1990s, this actor made a choice that surprised many. He turned away from acting and embraced a life of faith. This decision didn’t just change his career; it changed his entire worldview. What happened to him after he left Hollywood?
From Childhood Dreams to Unexpected Stardom
As a child, he didn’t dream of becoming an actor. He wanted to be a doctor. But when his mother, urged by a friend, introduced him to acting, his career path shifted. That friend was the mother of Adam Rich, a famous child actor. She suggested his mother take him to an agent to try his luck with commercials.

Though he wasn’t eager, his mother followed the advice, and by age nine, he was landing small roles. One of his first jobs was a commercial for McDonald’s. Despite his early success, he didn’t enjoy acting much.
He once said, “I was always annoyed having to brush my hair and tuck my shirt in to go audition.” Still, his career took off, and he became famous for his role as Mike Seaver on Growing Pains. But despite the fame, he felt something was missing.

From Atheism to Christianity
He grew up in a non-religious household. “We didn’t go to church,” he said. He considered himself an atheist by his mid-teens, influenced by teachers who dismissed religion as a fairy tale. At the time, he was focused on his acting career and had no interest in faith.
However, his life took a turn when he attended church with a girl he liked. “I went to church not because I was interested in God, but because I was interested in the girl,” he admitted. That casual decision eventually led him to embrace Christianity.
Hollywood’s Response
By age 17, his newfound faith began to impact his work on Growing Pains. The show’s producers and cast grew concerned about how his religious beliefs might affect the show. His co-workers worried that his changing priorities could put the show’s future in jeopardy.
Reflecting on those years, he said, “I was trying to take the moral high road, but sometimes I didn’t handle it as gracefully as I should have.” His commitment to his faith, however, remained strong.
The Dark Side of Hollywood
As his faith deepened, he became more aware of unsettling behaviors in Hollywood. “The evil, the darkness of Hollywood has been going on for a long time,” he said. He described troubling experiences behind the scenes during his time on Growing Pains.
One shocking event involved his dialogue coach from the show, Brian Peck, who was later convicted of sexual abuse. These incidents solidified his decision to step away from the industry.
Life After Hollywood
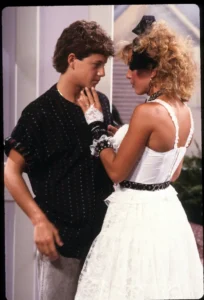
At 20, he married his Growing Pains co-star, Chelsea Noble, and they built a family-focused life together. The couple adopted four of their six children, a cause close to both of their hearts. Noble herself was adopted, and they helped their children connect with their biological families when the time was right.
Cameron’s dedication to his family and his faith became evident during the filming of Fireproof in 2008. He refused to kiss anyone other than his wife in a scene, so the filmmakers dressed Noble as the female lead for the shot.
Leaving California
In 2021, Cameron decided to leave California. He shared on social media that Tennessee, Florida, and Texas were top suggestions for a new home. Ultimately, he chose Tennessee for its slower pace and “wholesome values.” Three of his children already lived there, making the move even more appealing.
In Tennessee, Cameron found a community of like-minded people, including others who had left Hollywood. He appreciated the “healthy freedom mindset” and found Tennessee to be a hub for Christian projects.
Becoming a Grandfather and New Projects
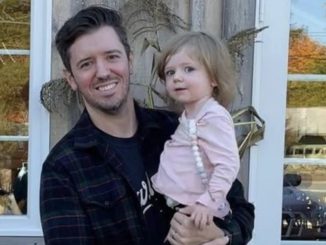
In July 2024, Cameron and Noble welcomed their first grandchild, Maya Jeanne Noble Bower. He shared the joyful news online, expressing his excitement for this new chapter as grandparents.
Cameron continued his work on faith-based projects, including the 2022 film Lifemark, which explores adoption and the value of life—a topic close to his heart as both a father of adopted children and the husband of an adopted woman.
Today, Cameron remains committed to creating media that reflects his beliefs. Though his teenage heartthrob days are behind him, his journey has brought him deep fulfillment and purpose.
Leave a Reply